Bro, why are you handcuffing yourself to a cupboard? Inquiring minds.......
If that's the only way you can get a woody.....
(Just speculating..) ![]()


 SlingSC and 7 others like this.
Lowpt2001 likes this.
Lowpt2001 and 3 others like this.
3GunSteve and 5 others like this.
SoCal and 5 others like this.
Tripod and 6 others like this.
EjFord and Frankie55 like this.
EjFord likes this.
MADDMOE and 5 others like this.
EjFord likes this.
Frankie55 and 8 others like this.
Frankie55 and 3 others like this.
ConnMan and 10 others like this.
EjFord and 3 others like this.
EjFord likes this.
DJohnson and 11 others like this.
Tripod and 7 others like this.
SlingSC and 7 others like this.
Lowpt2001 likes this.
Lowpt2001 and 3 others like this.
3GunSteve and 5 others like this.
SoCal and 5 others like this.
Tripod and 6 others like this.
EjFord and Frankie55 like this.
EjFord likes this.
MADDMOE and 5 others like this.
EjFord likes this.
Frankie55 and 8 others like this.
Frankie55 and 3 others like this.
ConnMan and 10 others like this.
EjFord and 3 others like this.
EjFord likes this.
DJohnson and 11 others like this.
Tripod and 7 others like this.


Bro, why are you handcuffing yourself to a cupboard? Inquiring minds.......
If that's the only way you can get a woody.....
(Just speculating..) ![]()

Is there anybody out there just installing and hiding a $.98 Killswitch?
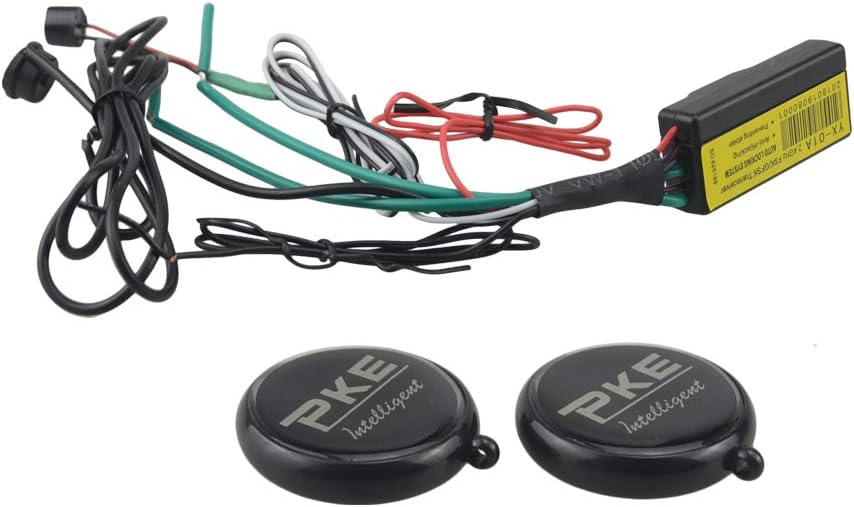
I recently installed an RFID immobilizer.
Basically a $30 kill switch. (add another $10 for a 70a relay)
If the fob is more than 15 feet away from the Slingshot, all power supplied to the motor (icu, fuel pump, starter, etc) is disabled.
Accessory still has power, just nothing else.
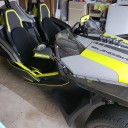
Installed behind the drivers armrest.
There is an override button just in case the fob battery dies. You need to press it in a certain pattern to override the immobilizer.
The instructions are close to useless. I only use those darn things after blood shed.
With such a low price, I was skeptical of the thing but, it works awesome.
What all was entailed to install this immobilizer?
That looks just like something I have been wanting.
Thanks
What all was entailed to install this immobilizer?
That looks just like something I have been wanting.
Thanks
For me, it was simple. With that said, I am very comfortable with wiring.
I pre-wired everything on my kitchen table. Soldered all connections between the unit and the 70amp relay.
That left a 4 wire hook-up in the Slingshot.
It does require that you cut and interrupt the red/brown wire behind the 40 amp fuse (at battery fuses). I extended these with heavy gauge wire into the armrest to the relay normally open. This also provides battery power to both pin 30 on the relay and the immobilizer red wire.
That’s 2 wires.
Ground directly to the frame inside the armrest. This also mounts the relay.
That’s wire #3
One wire must be run up to the key switch (brown/pink). This is just a voltage sensing tap so the unit knows that the key was turned off.
That is wire #4.
I will draw up a schematic of how mine is wired and post. Not tonight though…..getting ready for a little Superbowl action.
I just uploaded a quick video. Very quick but, it shows what happens.
Even with the key turned to ignition, no power to motor until the fob gets close.
Very cool - Nice work!
I have some pic's of what I have been working on. Some pic's are the things I did differently, had to mod to make it work, or make it fit my OEM plus styling.
On the front splitter, I added bolts on the outer corners, changed the long center bolts to button heads, and added two more long bolts to the same center stanchions.
Have Pic's of hood vent install. I changed the hardware to black stainless. I also use rubber caps to cover all the protruding screws on the underside.
When I installed my DDMWorks sway bar mount brackets, I noticed how much side to side movement there was, so I added locks. I gathered the parts and assembled my own end links. I was going to pull the rubber booties off the stock links (OEM plus), but I had already bought the little rubber covers shown in the pic. You can see I put a rubber cap on the grease fitting.
Took one diff brace off, and put one on. Didn't have any issues with the first one.
In regard to the oil cooler/filter relocation, the frame of my 2019 is different than explained in the instructions. I already knew this before I ordered the kit. I added a fender washer under the rightmost mounting hole of the filter bracket, to sandwich the frame that is there. With the intake out of the way, you can see the filter adapter orientation.
Old shocks and new shocks
Changed the hardware that came with the Assault roll bars. There was no way I was going to use the flatheads that came with it. The depth of the countersinks in the covers were all over the place, and the flat heads would never be flush. Changed to black button head stainless screws.
Installed an oil catch can. I use shrink tubing to give it the look I want
Added an H3R fire extinguisher
I have went back and forth on those hood vents. Can I take a whole hood shot when I get a chance please. I hate to cut the hood.
I didn't want to cut the hood either, but function over form this time. When I was done, I liked the look right away.
I plan on adding some screen material underneath, because I know my new tires are going to be throwing rocks thru the vents. I am also hoping that the screen will lessen my focus on the sticker under the hood on the drivers side. I thought about possibly 3D printing a scoop, bolted to the underside, to cover the sticker are and the same on the passenger side
Here is a pic of the whole hood
That looks good. I think mesh material is a good idea. I wonder how bad it is about throwing water up.
Finished the wife's LED's just before the game and then pulled it outside to do a walkaround once it got dark. One of the TricLED halo's is only working on 1/2 of it, so need to see what's up with that. Other than that I like it... not a Christmas tree, but she'll get the looks I think she's after the next time we do a "cruise Nevada" or Downtown Denver ride!
Wife shot vid of me backing her in - love that exhaust sound!
Blog updated with pics of this install - Wife's LED Install
 Display More
Finished the wife's LED's just before the game and then pulled it outside to do a walkaround once it got dark. One of the TricLED halo's is only working on 1/2 of it, so need to see what's up with that. Other than that I like it... not a Christmas tree, but she'll get the looks I think she's after the next time we do a "cruise Nevada" or Downtown Denver ride!
Wife shot vid of me backing her in - love that exhaust sound!
Blog updated with pics of this install - Wife's LED Install
Holy shit batman!
Good garage day today. Removed the switchbacks from below and added new ones up top ( Thank You TricLED) . Added the resister in line on the yellow wire so the hazards work with the SS off now.
Continued with the bolt replacements and new caps. Fender side and inside floor boards. I am getting close to getting them all .
And installed a customer cup holder 🙂
3”rubber pipe coupling with a 3”cap in the bottom and screwed into the floor with one pan head. Sprayed flat black w/ 1/8” round rubber insert in the bottom. Not gunna move. Done! Holds our large stainless perfect!

That looks good. I think mesh material is a good idea. I wonder how bad it is about throwing water up.
IIRC, most folks who have installed the vents have not experienced a lot of water coming thru the vent. I believe they said the angle the water leaves the wheel is more oriented towards the rear.
I guess I'll find out for sure once I get around to installing the hood vents. I already removed the mud guards.
SoCal I like the cup holder idea. What is the plug(?) To the side of the seat?
you’re killing me! I was actually going to do a post on that because I have no clue what that is. Perhaps access for some kind of transmission service?
you’re killing me! I was actually going to do a post on that because I have no clue what that is. Perhaps access for some kind of transmission service?
Mine has it too, but I've seem/heard that not all do... Interesting...
What all was entailed to install this immobilizer?
That looks just like something I have been wanting.
Thanks
This is the immobilizer:
This is the relay used:
This is how I wired it in my Slingshot.