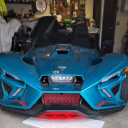
Is this an issue on later Slings that you are aware of?
Nope, there is a lot more clearance between the engine and hood on the 2020+ models


 EjFord and 6 others like this.
chavey2 and 6 others like this.
chavey2 and Trooper like this.
EjFord and 8 others like this.
VV11B40 and 4 others like this.
SoCal and 3 others like this.
SoCal and 7 others like this.
FunCycle and 7 others like this.
EjFord and 5 others like this.
Luigi and 13 others like this.
EjFord, Trooper and SoCal like this.
EjFord, FunCycle and Trooper like this.
MADDMOE, EjFord and Trooper like this.
EjFord and Trooper like this.
EjFord and Trooper like this.
FunCycle, EjFord and Trooper like this.
EjFord and 3 others like this.
Dave@DDMWorks and 3 others like this.
EjFord, Dave@DDMWorks and Trooper like this.
billythekidd and 3 others like this.
EjFord and 6 others like this.
chavey2 and 6 others like this.
chavey2 and Trooper like this.
EjFord and 8 others like this.
VV11B40 and 4 others like this.
SoCal and 3 others like this.
SoCal and 7 others like this.
FunCycle and 7 others like this.
EjFord and 5 others like this.
Luigi and 13 others like this.
EjFord, Trooper and SoCal like this.
EjFord, FunCycle and Trooper like this.
MADDMOE, EjFord and Trooper like this.
EjFord and Trooper like this.
EjFord and Trooper like this.
FunCycle, EjFord and Trooper like this.
EjFord and 3 others like this.
Dave@DDMWorks and 3 others like this.
EjFord, Dave@DDMWorks and Trooper like this.
billythekidd and 3 others like this.


Is this an issue on later Slings that you are aware of?
Nope, there is a lot more clearance between the engine and hood on the 2020+ models

Nope, there is a lot more clearance between the engine and hood on the 2020+ models
Thank you! You are the man, myth and legend!

I have the red valve cover. I had a problem with the screw on the hood hitting the cover and dinging up the paint.
Pull that screw out and install a flathead screw in it's place. Counter sink the hole just a little, being real careful not to drill thru
Nothing big... just a glove box organizer.... I am sure glad they provided instructions on how to install.... ![]()
Pull that screw out and install a flathead screw in it's place. Counter sink the hole just a little, being real careful not to drill thru
Too late now damage done.
Probably relates to how the hood is adjusted.
....I will definitely be paying attention to it now.....
Probably relates to how the hood is adjusted.
No, it does not

......so I'm in my driveway & decided to wash my car real quick after all the work I just did to it over the last few days ( replaced my thermostat, water pump, transmission fluid & replaced all my front bushings thanks to harbor freight ) so as I'm drying my car off I noticed a box on my front ramp and it had a familiar tape on it that looks too familiar, man am I smiling now and thankfully I just finished some work on someone's bike , time for my slingshot to get some TLC.......Thanks Dave@DDMWorks ......
That’s a bad ass victory!!

That’s a bad ass victory!!
......someone did the paint touch up on it and when they put the bike back together they messed up the electronics (brake light, blinkers, horn would keep blowing fuses) so that's how he found me and now it leaves today running like new & time for my slingshot work next
Porsche Turbo engine: Hold my beer
I got the front shocks on and new air filter. Took all of 20 minutes. Put the wheels back on and will torque after I take off lift. The rear shock was a failure. I kept trying to get the upper mount done first. I couldn't get the bushings to fit in the bracket and I lost the rubber ring on one. Looked for an hour but could not find it. So I finally switched bushings and the upper would slide right in the bracket. When I sent the shocks to jri to be rebuilt I had the bushings zip tied in place. Wonder if they switched them by mistake after rebuild? I'll head to the auto parts store in hunt for a new rubber ring tomorrow. Also enlist a friend to help with rear shock. Too much snow to risk going today.
I got the front shocks on and new air filter. Took all of 20 minutes. Put the wheels back on and will torque after I take off lift. The rear shock was a failure. I kept trying to get the upper mount done first. I couldn't get the bushings to fit in the bracket and I lost the rubber ring on one. Looked for an hour but could not find it. So I finally switched bushings and the upper would slide right in the bracket. When I sent the shocks to jri to be rebuilt I had the bushings zip tied in place. Wonder if they switched them by mistake after rebuild? I'll head to the auto parts store in hunt for a new rubber ring tomorrow. Also enlist a friend to help with rear shock. Too much snow to risk going today.
When doing the back shock, it is a lot easier if you remove the plastic panel under the deck and loosen the bolts holding the plastic panel that the shock goes through. Then you can reach right in and put that upper bolt in without much work at all. It takes a little more time to do, but sounds like you have plenty of time up there right now with the weather. As for the spacers, you want the wider ones on the bottom and the narrow ones up top.
When doing the back shock, it is a lot easier if you remove the plastic panel under the deck and loosen the bolts holding the plastic panel that the shock goes through. Then you can reach right in and put that upper bolt in without much work at all. It takes a little more time to do, but sounds like you have plenty of time up there right now with the weather. As for the spacers, you want the wider ones on the bottom and the narrow ones up top.
Thanks dave@ddmworks are the rubber orings generic that I can pick up at any auto parts store?
Thanks dave@ddmworks are the rubber orings generic that I can pick up at any auto parts store?
You can use any rubber O-ring that is roughly the same dimension. They are there to keep the shock from moving around only, so they kinda act like a little damper for side to side movement.
On our trip this last weekend I had my DDM works three ways on 2 compression and 1 rebound so we were kind of gushy Cadillac the whole way. It was nice.😎
dave@ddmworks after removing the front screws on the upper cover does the plastic just come off?
I got the front shocks on and new air filter. Took all of 20 minutes. Put the wheels back on and will torque after I take off lift. The rear shock was a failure. I kept trying to get the upper mount done first. I couldn't get the bushings to fit in the bracket and I lost the rubber ring on one. Looked for an hour but could not find it. So I finally switched bushings and the upper would slide right in the bracket. When I sent the shocks to jri to be rebuilt I had the bushings zip tied in place. Wonder if they switched them by mistake after rebuild? I'll head to the auto parts store in hunt for a new rubber ring tomorrow. Also enlist a friend to help with rear shock. Too much snow to risk going today.
Take the top screws out of the back panel and maybe 2 or 3 down the outside. Then you can see what you are doing and get your hand in there. You do not have to remove the panel.

