Posts by roadog1aj

    Ok here are my updated pics...Took SS for a cruise around town with my son..Roads still have sand. did not like the sound of sand hitting machine, I need flaps!!...


    Wow!!! Looking pretty DAMN sharp Brother!!! I'm diggin the Metriks farkles big time!!! You need to clean up that one big smudge though.....it's very unsightly........J/K....awesome Sling my friend!!! :thumbsup::thumbsup::thumbsup:

    Ok, we continue with my install.
    Here are more pics of the wiring along my mirror supports:


    Once I was happy with how I routed my wires, I went to work on the Steering column. Fully lower the steering column to make it easier to get to all the screws and remove the upper cover half. Step 20 of the instructions say to remove three screws. There are actually 4 screws. 2 T-25 Torx screws under the steering column:

    and 2 T-30 Torx screws located on the sides of the cover.Removing these two screws will be easier if you have a 1/4" drive T-30 Torx socket driver and 1/4" drive ratchet:


    Once I removed those 4 screws, I located the electrical connector behind the speedo and disconnected it. It's kind of a tight fit but not super hard to work on. I used a small straight bladed screw driver to carefully open the connector halves, and not break the fragile little posts that keep it snapped together. Using the supplied wire taps, I stripped the ends of the LED wires and easily connected them per the instructions. I really liked those wire taps!!!!:

    Once I tested the turn signals and emergency blinkers, I closed connector halves, connected it back into the speedo connector, and retested the lights to be sure it was connected properly to the speedo. Once that checked out, I buttoned everything up on the steering column (I used some never-seize on the screw threads to help them thread back in without stripping).
    Once I finished up with the steering column, I proceeded to wire tie the wires neatly along the mirror supports and wiring harness along the firewall, using my own BLACK wire ties. I DID NOT USE the white wire ties that were supplied with the kit. I thought they would look like ass if used on the black mirror supports!!! If you have white mirror supports, these will be perfect, but for the rest of us......why wouldn't they have been black????
    That's it, here is the lights working wonderfully:


    Start to finish, this took me almost 2 hours. Not bad, since I'm rather anal, and take my time doing things. The lights are nice looking, and quite bright. Time will tell as to how well the adhesive strips hold the lights to the mirrors.
    Overall, I like this kit. The included instructions were well written with pictures. The only error was Step 20 (there are 4 screws, not 3 as written). I would also hope that they include Black wire ties in future kits, instead of the White ones. Otherwise, you should make sure to have plenty of your own black ones on hand. Hope this helps others if they are thinking about buying these lights!!!
    The End
    [/quote]

    Ok, I have not done a full blown install thread before, so hopefully
    this will end up being helpful and informative to anyone thinking about
    buying the kit.
    I purchased the LED Turn Signal Kit from here: Polaris Slingshot Side View Mirror Turn Signals
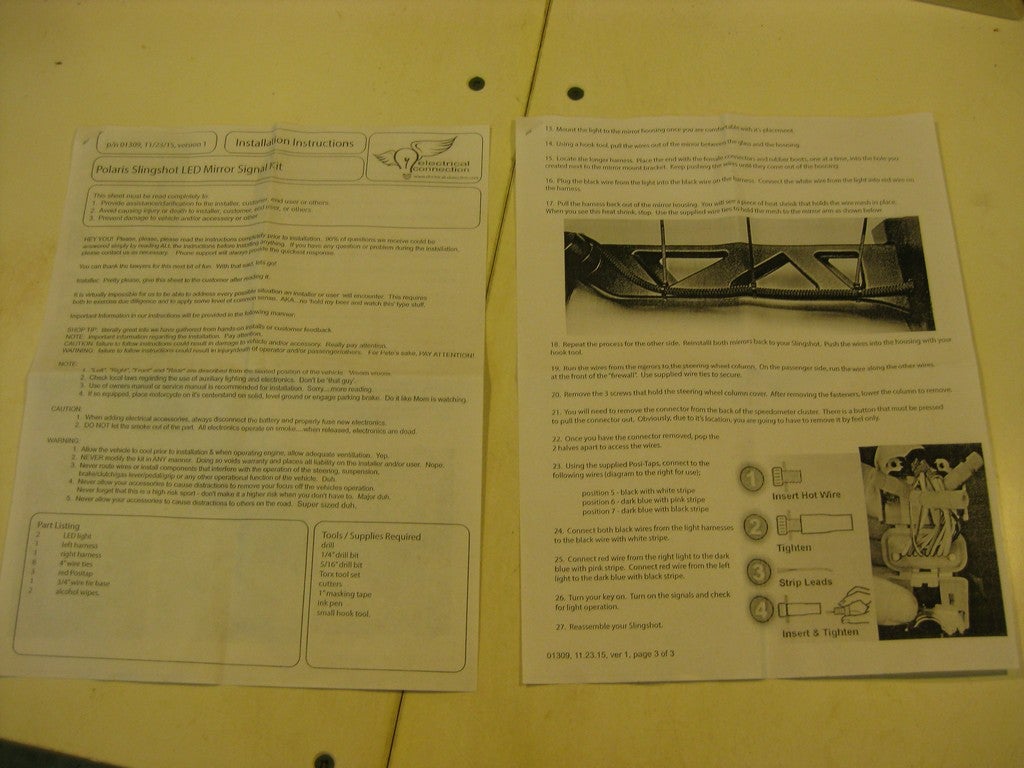
    Received it within a week. The kit contained three pages of
    instructions. My instructions have an "11/23/15, version 1" listed on
    the top left corner. Your instructions may have a different version, so
    they may not be exactly like mine.


    Here is what came in the kit (Note the White wire ties....should be black in my opinion):


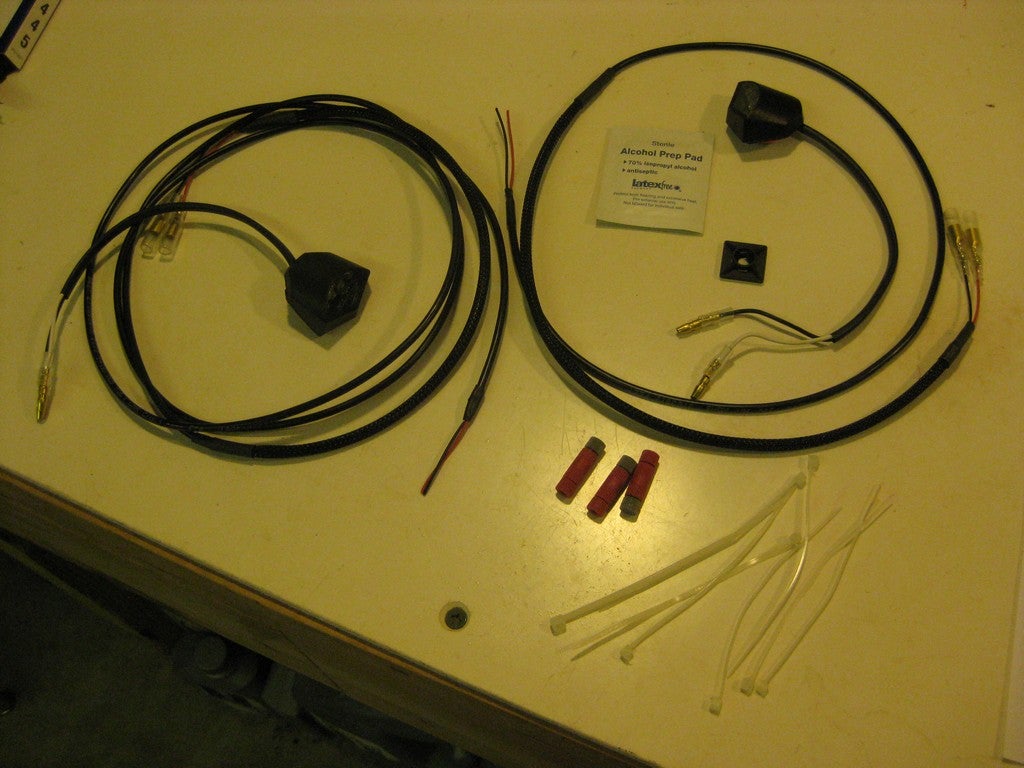
    Here are tools I used for my install:

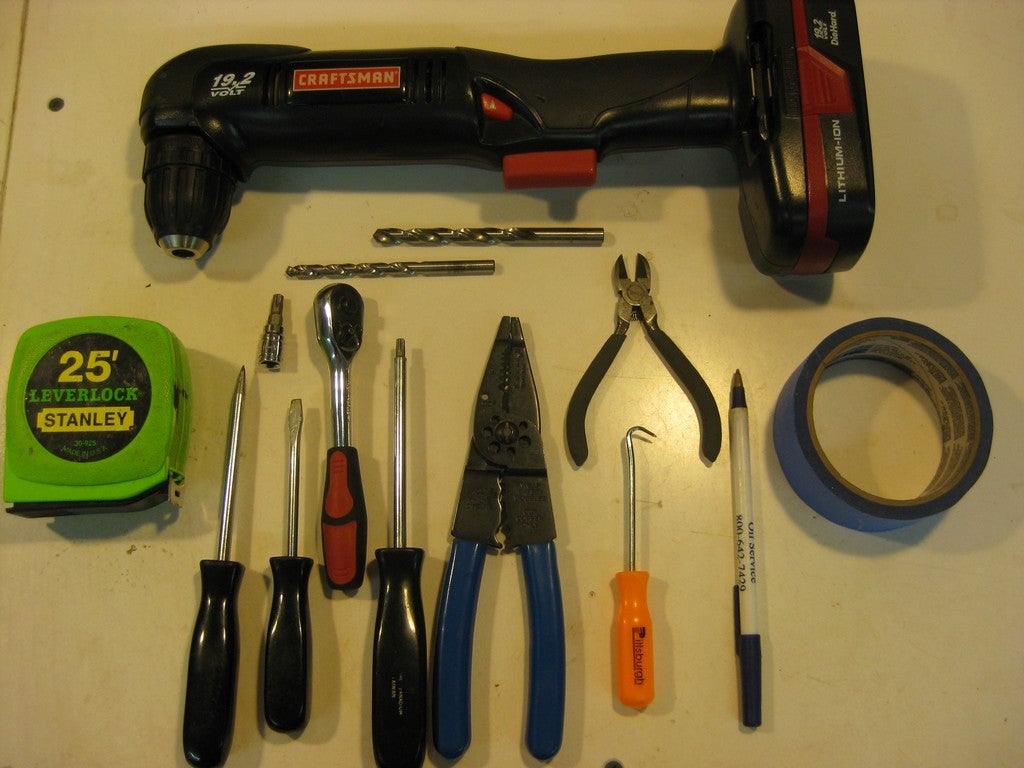
    The tools are pretty straight forward and per the instructions. The
    Torx tools needed are: T30 1/4" drive socket & T25 screwdriver. I
    also suggest a small straight bladed screw driver to open the electrical
    connector halves noted in step 22.


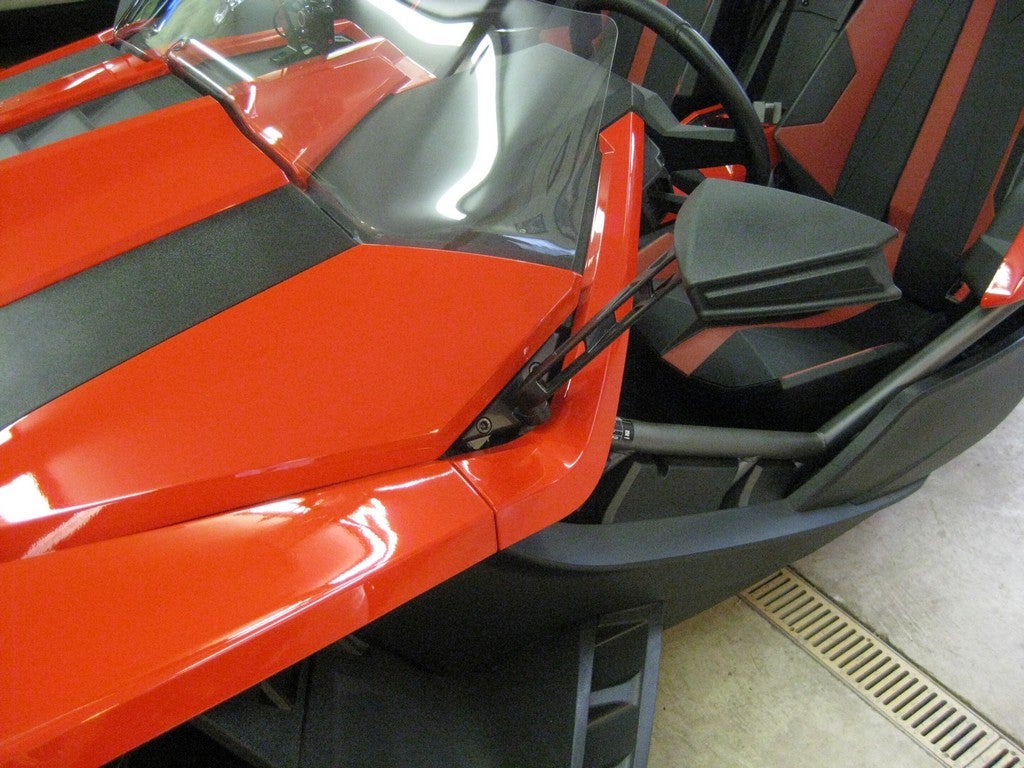
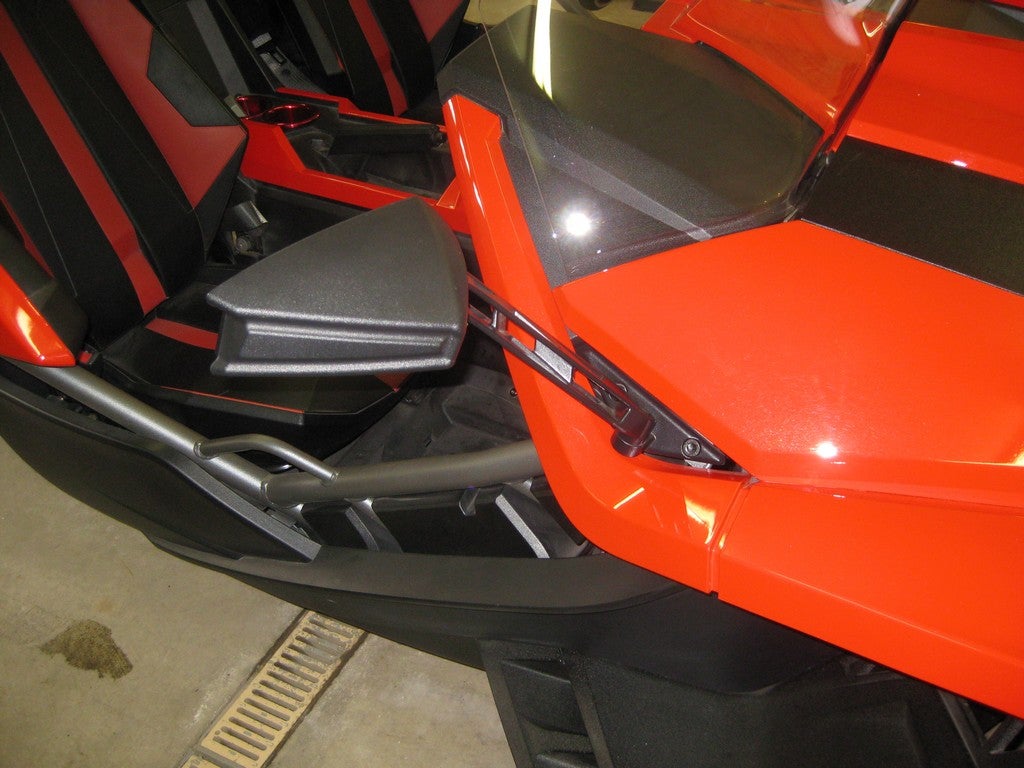
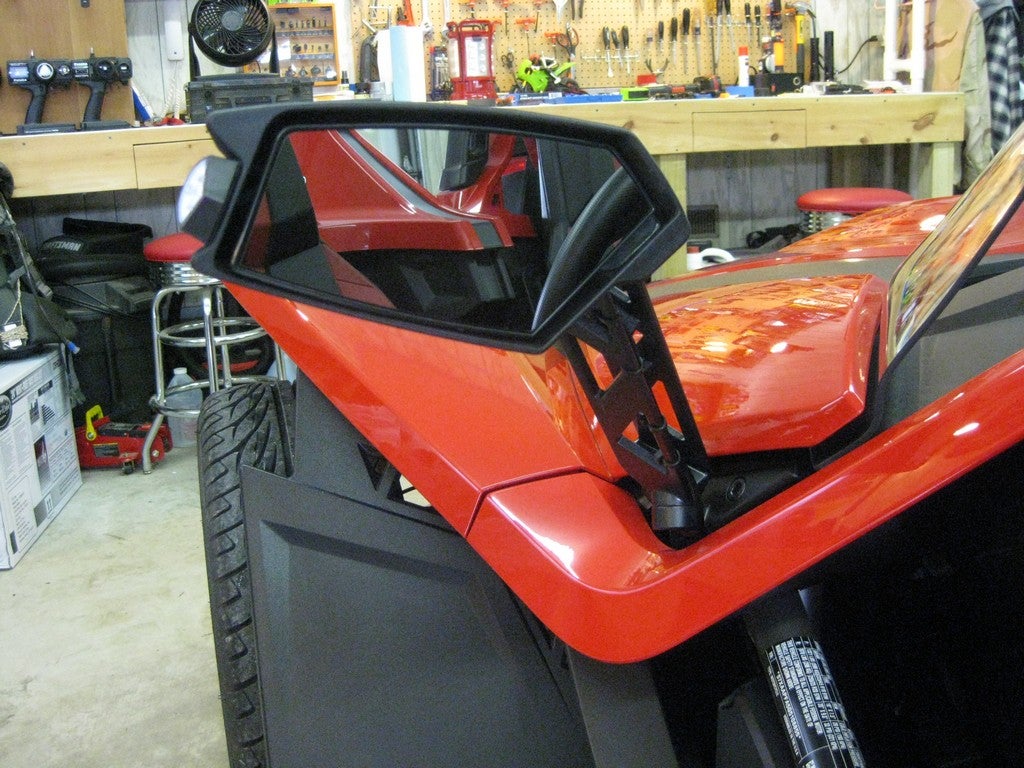
    Now some shots of the mirrors before I start:


    I followed the instructions for the most part. I pre-read them, and I
    felt that I could do the drilling and running the wires without removing
    the mirrors. I do not recommend this if you are not comfortable with
    using your drill or tools around the body of the SS. You could make a
    mistake that damages the paint or other parts of the SS. Leaving the
    mirrors on the SS worked fine for me and saved me a few steps.
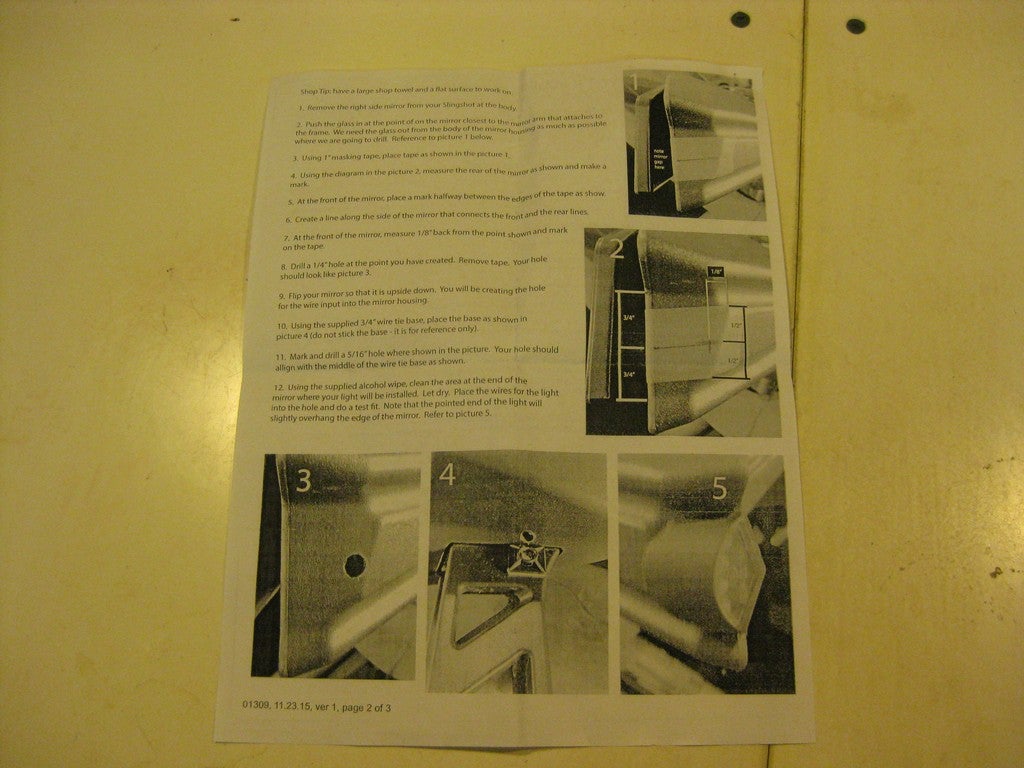
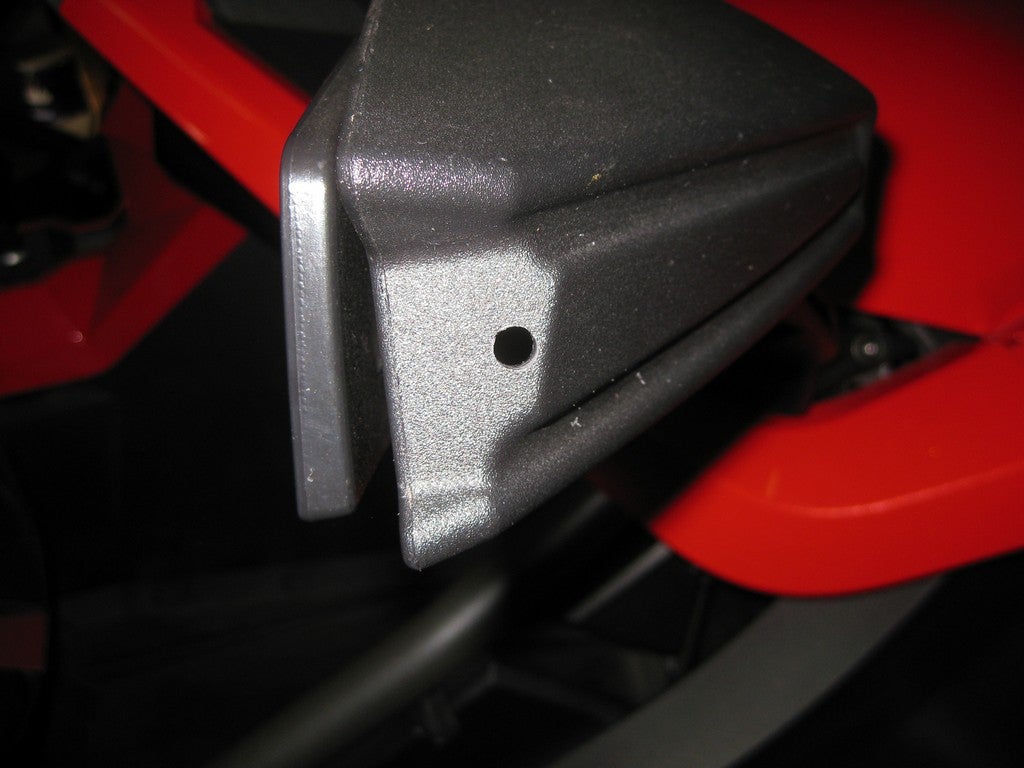
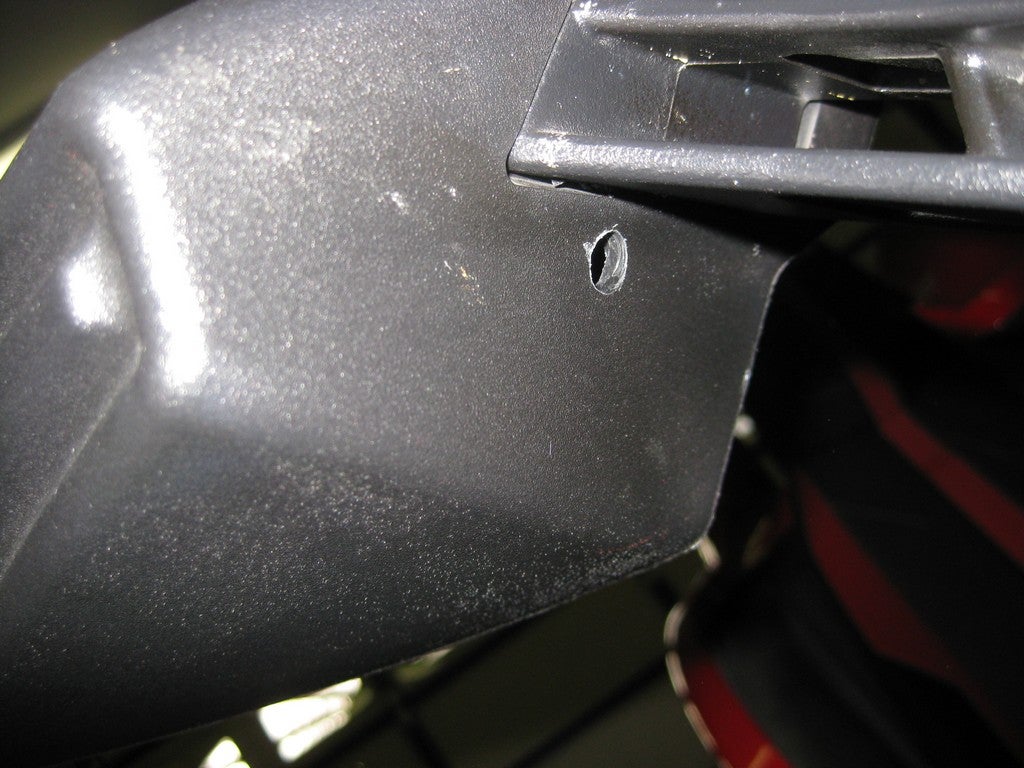
    The Instructions are well written, and I followed them pretty closely, starting with drilling the holes:
    1/4" Hole


    5/16" Hole:


    Then I fished the wires through the mirror holes and mounted the LED's:


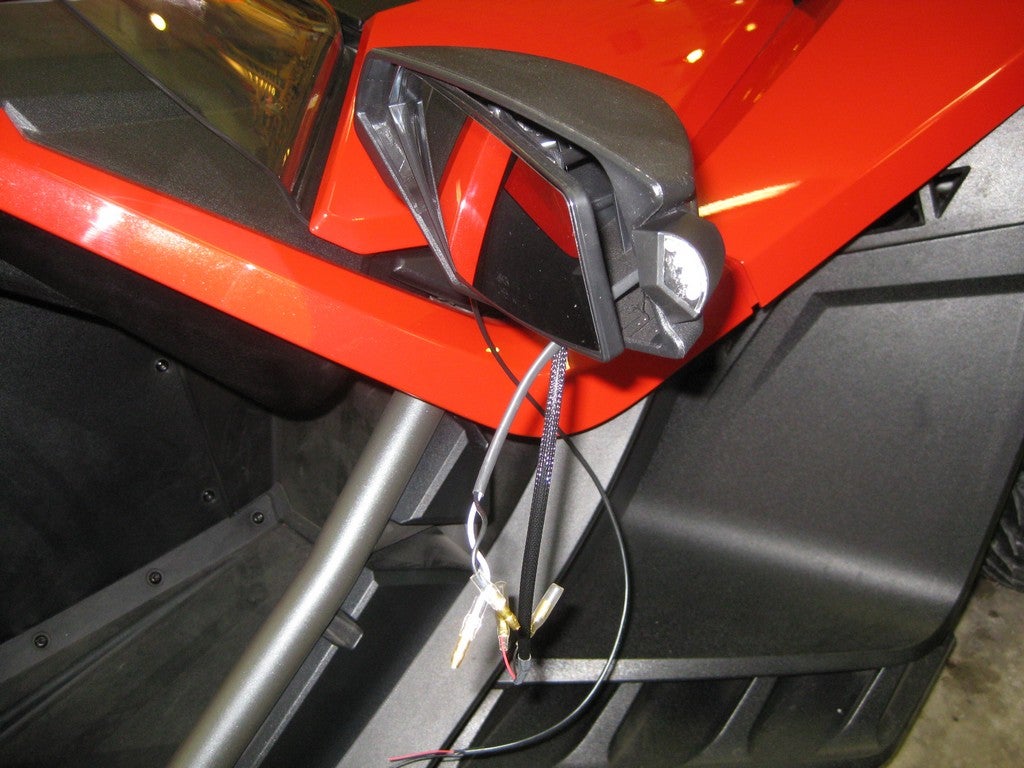
    Once both sides were mounted and wires were connected behind each
    mirror, I routed the other ends along the firewall, and then through the
    firewall, behind the instrument cluster. I deviated from the
    instructions when it came to locating the wires along the mirror
    supports. They show them fastened to outside of the front of the
    supports. I thought that looked rather unprofessional, I ran mine inside
    and to the rear of the supports. You actually have to look pretty hard
    to notice them:


    Install to be continued in part 2

    Shamelessly stolen from the dark side:


    These are brand new to market and just came in at my dealer. Photos attached. They fit in the behind the seat storage compartments. Two bags for each side. They are $150 per side. They seem to give you the most possible storage out of those compartments. What do you think?


    I like em!! They would surely be a good way to keep stuff dust free, and relatively dry. Dust free would be a biggy!!!! Seems like dust just loves all the nooks and crannies in my Sling!!!!

    I do have a temp gauge on mine. Once I get my other parts back I will compare it to the days of old. Granted mine would run aproxinmately 180° while driving but would run up to 212° after sitting at a red light for a couple minutes. The fan would then kick on and the temp would immediately start dropping to about 194° and then turn off. I figure that is about normal operating range. I have had it holding at 163° for hours though when the outside temp was 60° and I was traveling 70mph toward Tampa.If it gets to 212° and the fan can bring it down some from there, i think everything will be fine with engine temps.


    Stephen

    Good info!! I'll watch for your update once you get a chance to check things out!!

    Yeah @roadog1aj I had trouble with the bolts too, but as soon as I used something to align one of the holes, the other bolt went right in. Then the same on the other side. Weren't you going to try a different fan switch sensor? How did that work out, or have you not done it yet?


    Stephen

    No, that wasn't me. Another member discussed the goods & bads related to different fan switches. I'm in a colder climate, so the heat issues may not be as worrisome. After I did the install, I started thinking about how well the fan would be able to move air pretty much straight down, instead of straight back as it was designed to do. It got me thinking about cavitation, and if the fan would be able pull cool air through radiator efficiently. I'm gonna drive it for a while to see how things go, but I very well may end up just cutting it out so I don't worry myself to death. I think if I had to start screwing around with everything else related to the temps, like switches, heat shielding for wires, etc. I'm better off treating the cause, and not the symptoms.........cut the frickin deflector out and get on with life!!!

    Huh....just went on the "Other Forum" to see if my PM to @Rob was edited......sure enough.....it was (***********). I thought that's what PM's were supposed to be for???? It's not like I'm trying to steal forum members away from them. I just want all the folks I've come to know and respect to have information about other forums that they can check out and join if they so desire. Totally up to each person......I don't care if they belong to 100 forums, or just one!!!!.....so long as it's this one, of course!!!!
    So I added a message stating he could still find the place called: slingshotinfo-dot-com
    I'll see if they edit that too. I'm sad such a great site has fallen to the level it is now. I cut my "Slingshot Teeth" in that site, and still have lots of good posts, and pics on it. Wish there was a magical "Import" button that I could use to bring my stuff over here!!!!

    I was looking at the membership ($14.99 per year) fine print on the other site and it said something about a auto recurring membership... To me that means some of y'all will get auto charged once your year is up... just an FYI

    Yep....I had already changed my settings to not renew way back when the SHTF over unwanted advertisements suddenly popping up. It's good to bring it up though, so others realize they have to change that setting!!!

    Well, this a strange story.....unless you know me (nothing is strange in my world). I am not s smoker...tried really hard, but couldn't stand the headaches. My wife is the smoker and is working on cutting back, so I researched the E-Ciggs, and found out just how much Dis-information the tobacco industry is pumping out to keep people from going the vaping route!!! I frequented some forums and also found some super helpful info and advice on Phil Busardo's website: Tasteyourjuice.com
    Anyways, I wanted to get the best vaping device and juice for my wife, so I researched everything!!
    I ended up getting her started with an Innokin iTaste V3 and Aspire BDC Glassomizer tanks. Then I ordered a bunch of different flavors and Nic strengths until we hit on what she liked the most. Started out with Cinnablaze from Vapor4Life, and grew from there. The odd part is that I don't smoke, but I've always had thing for flavored cigars and flavored pipe tobaccos. So while researching for the wife, I ended up finding devices and e-juices that I really like (zero Nic for me). I find myself enjoying the vape more than my wife does!! It's all about flavor and watching my cloud as I relax my brain once in a while in the office, and at home. The wife has cut back on smoking by about 50% (any reduction is better than nothing!!), and she has moved from the Cinnablaze to a custom e-juice I created on Gourmet Vapor's website (Creamy Berry Goodness). Here is what we have for devices and e-juices:
    Devices:
    Innokin iTaste V3.0 variable watt & volt with an Aspire BDC Glassomizer (wife uses this exclusively)
    Vapor 4 Life Vapor Zeus E-Cigar with large Smilomizers
    Stingray 18650 Tube Mod with Kanger Sub Tank using .5ohm coils
    Innokin Arachnid 1860 Tube Mod with Aspire Atlantis Sub Tank using .5ohm coils


    E-Juices:
    Vapor 4 Life: Cinnablaze. (Wife said this was the closest thing to real cinnamon for her)
    Gourmet Vapor: Creamy Berry Goodness. You can create your very own e-juice on this site, and it's really good. I use it in my Arachnid, and the wife switched over to this after she got tired of the cinnamon.
    NicQuid: Strawberry. This is hands down the closest thing to biting into a real strawberry that I've found yet. even the smell from the bottle makes you think your holding a nice juicy strawberry!!
    Vapor 4 Life: Blueberry. This is the closest to real blueberry flavoring that I've found for myself.


    Here are some pics of a Vape Case I built, and the wife did the wood burning.

    Yep...getting those fan bolts back in was HUGE PIA when I did my install a couple weeks ago!! This was THE hardest mod install so far for me. I wouldn't recommend anyone with limited mechanical skills try this without help, or simply take it to a trusted mechanic/dealer. If I decide to remove that fan deflector (still on the fence regarding effectiveness), I'm definitely not doing it the hard way....I'll cut the sucker out.


    Great write-up @Toobad4u!! Thanks!!

    roadog1aj here.....still sporting the same ugly mug as I did on the other two forums. Also known as Adam to my friends. Of course, you can call me pretty much anything, just don't call me late to supper!!!!

    Fun, I have been beated, scolded and received so many private messages for my God Damn Mouth on other forum Im almost gun shy to even say Damn! :00008356:
    My family had an intervention for me to clean up my act of damming. Now that Im here alls out the Damn door and I can enjoy myself with you Damn good fellers!!! So with that raise your glasses "DAMN" :00008040::00000436:

    Damnit @BONES.....what am I supposed to do with all the dish soap I was going top send you??? Plus, I'll have to retire my Lightening Clock I was so fond of using in the other forum (counting down until you got spanked yet again)..........I guess all good things must come to an end.........