To all you Yankees, how do you do it? With this cold weather in Texas it may be 5 days till I can ride my Slingshot. How do you survive?
With a foot and a half of snow outside……..it’s a good time to accessorize!


To all you Yankees, how do you do it? With this cold weather in Texas it may be 5 days till I can ride my Slingshot. How do you survive?
With a foot and a half of snow outside……..it’s a good time to accessorize!
I believe factory wiring is as follows:
Black – Ground
Dark Blue/Red trace – Turn signal
Dark Green/Pink trace – Marker lamp
Some aftermarket chasing style led strips don’t play nice with the 4-way flashers. If you run into that problem, the addition of a 200 ohm resistor in line to the turn signal portion of the led strip usually does the trick.
What all was entailed to install this immobilizer?
That looks just like something I have been wanting.
Thanks
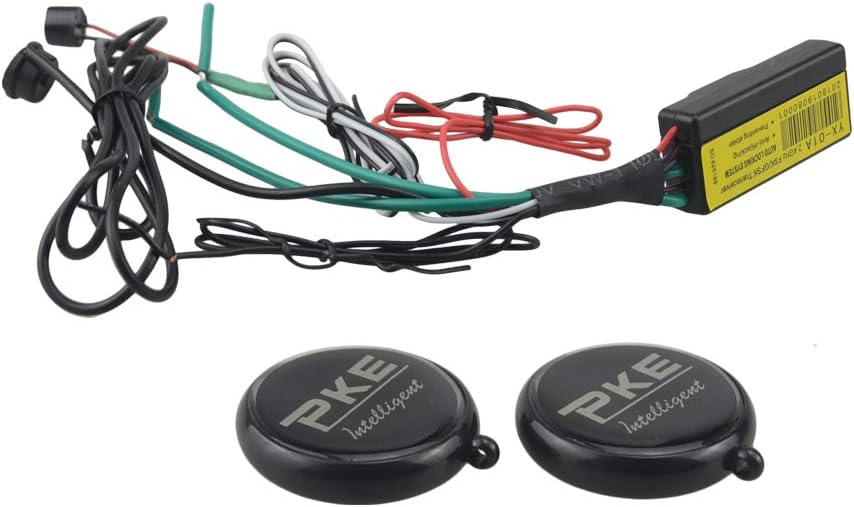
This is the immobilizer:
This is the relay used:
This is how I wired it in my Slingshot.
What all was entailed to install this immobilizer?
That looks just like something I have been wanting.
Thanks
For me, it was simple. With that said, I am very comfortable with wiring.
I pre-wired everything on my kitchen table. Soldered all connections between the unit and the 70amp relay.
That left a 4 wire hook-up in the Slingshot.
It does require that you cut and interrupt the red/brown wire behind the 40 amp fuse (at battery fuses). I extended these with heavy gauge wire into the armrest to the relay normally open. This also provides battery power to both pin 30 on the relay and the immobilizer red wire.
That’s 2 wires.
Ground directly to the frame inside the armrest. This also mounts the relay.
That’s wire #3
One wire must be run up to the key switch (brown/pink). This is just a voltage sensing tap so the unit knows that the key was turned off.
That is wire #4.
I will draw up a schematic of how mine is wired and post. Not tonight though…..getting ready for a little Superbowl action.
I just uploaded a quick video. Very quick but, it shows what happens.
Even with the key turned to ignition, no power to motor until the fob gets close.
Ebay exhaust system - poor quality!
I should have known better but, I wasted my money on this:

In less than 500 miles, the muffler can internals began breaking down. Took the muffler off and I had a maraca.
So, I found another race muffler that would fit. I had to have my welder tig some v-band clamps and I thought I was good to go for a while.........nope.
A little over another 500 miles and the weld let go where the collector all meet to a single pipe. So, back to my welder. He did a great job and I was good to go for the season.........well.........not the full season.
At the end of the summer, things got loud. And, I had a clunk. Turns out another weld at the top cracked. The entire muffler can was now swinging like a tire swing. So, back to my welder.....AGAIN......he did a fantastic job, added a gusset so it could never happen again.
The exhaust is holding up great now. It hangs perfectly in my garage. Hasn't broke yet.
I am enjoying my Welter duals.
If anyone is looking at these ebay exhausts from "improvemotorsports" - don't, unless you want to brush up on your tig skills.
Is there anybody out there just installing and hiding a $.98 Killswitch?
I recently installed an RFID immobilizer.
Basically a $30 kill switch. (add another $10 for a 70a relay)
If the fob is more than 15 feet away from the Slingshot, all power supplied to the motor (icu, fuel pump, starter, etc) is disabled.
Accessory still has power, just nothing else.
Installed behind the drivers armrest.
There is an override button just in case the fob battery dies. You need to press it in a certain pattern to override the immobilizer.
The instructions are close to useless. I only use those darn things after blood shed.
With such a low price, I was skeptical of the thing but, it works awesome.
It is in the hands of the insurance company now. I will see what they do. I have the additional 3K of add on's available to me if they total it but boy O boy I hope they don't! Kelly blue book says it is a retail of 13,900. I think I have about 2500 + in goodies on it as well. Not sure.
I am only speaking with the service dept so far and they could not be nicer. Fingers crossed.
Any one know what the level of a "Total" is? 50%??
Hope you get it repaired or replaced.
Your travel photos are nothing short of legendary.
Best wishes.
🧐 Hummmmm good insight 🙂 I’m rather simple. All I want is a pretty header and if the ol girl breaths better and perhaps sounds a little better I B happy. Might just do a coonass performance kit ( punch a couple of holes in da muffler) 🤪
There is a good sale going on for a Twist Dymanics header.
This is what I chose in front of the Welter system.
Bolts up to stock exhaust as well.

Thanks Ed!!
I'm probably in the minority, but I was in a Slingshot with a CAT Delete pipe. The smell of the exhaust drove me nuts. That's why I never did anything with it.
I started my quest for a bit more aggressive sound by installing a 1320 cat delete pipe still using the factory exhaust. The exhaust fumes in the cabin was terrible.
Exhaust upgrade 2.0 consisted of an ebay header / exhaust.
https://www.ebay.com/itm/2015-…ksid=p2057872.m2749.l2649
This exhaust was LOUD. Basically, a long tube header directly through a stainless cherry bomb. I ended up installing a 3 disk collector insert from www.carchemistry.com - this tamed the exhaust enough that is was bearable. Still loud but only stupid loud when I had my MeanSling sport top. With the top, no cabin conversation could happen. Surprisingly, cabin exhaust fumes were minimal (far less than the cat delete/stock muffler).
Unfortunately, this exhaust is made CHEAP. Anyone considering this should just toss $400 in the woodstove for kindling. At least that way, you get some use out of the cash. Within the first 500 miles, the inside of the muffler can started breaking down. Sounded like it was filled with chicklets. Since no replacement parts are available from the ebay maker, I found a race resonator and had my welder weld on some v-bands.
Shortly after that, I heard a vibration when revving the motor. It ended up being a cracked factory weld. So, back to my welder. Fast forward to the end of the summer and more factory welds were broken to the point that the muffler can was swinging back and forth. So……..back to my welder again. It turns out that, since this junk hangs completely by the manifold bolts only, just the resonant vibration shreds the cheap stainless factory welds. I did have him weld things up - -WAY stronger than from the factory with an added gusset.
Being disgusted with that exhaust, I recently installed a Welter rear exit (w/cat delete down pipe). Decided to leave the Welter silencer insert on the shelf. I couldn’t be happier with the sound. I do get some exhaust fumes when backing out of the driveway and a slight bit at certain speeds but, nothing that bothers my wife or myself.
So I has some stainless paperweights hanging around the garage.
Ya Mark....
You almost killed me when you told me what setting to start at!!!
It gets the adrenaline flowing quickly!
I know you were quite busy this past season. Hopefully we can get together more often.
I still have that steering wheel puller in my storage compartment. Holding it hostage! My demands…….we do some back roads!
Hope all is well.
I have had my Pedal Commander for a little over a year. For me, I love it.
The manufacturer claims “Eliminate your throttle lag with 4 different modes, with 9 settings each. A total of 36 different modes to choose from to fit your daily driving needs”.
My opinion……It delivers on those claims. Each user can customize pedal response to their own liking. If you like the way your throttle response is from the factory, well no need to even purchase any of these units.
For those that think that they can just mash the pedal harder and quicker to achieve the same results …… I had the same thoughts until I decided to give one a try.
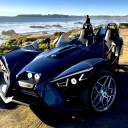
285+miles today! Got the new off the tires! Ended up about 2 miles south of the scheduled restaurant as too many people there! BBQ spot was excellent and we will return. Stopped for some desert trails- great hike. 90 degrees so not to far.
BBQ + PIE
I would stop there as well.
😎 Put it on your list! 3GunSteve
That view is insane!! My current view.....4" snow today in Mass. Not fair.![]()
![]()
mpj220 I did not re-install the rubber boot. It would only trap heat. Bulbs are waterproof.
So no boot at all? Just thinking of perhaps leaving the fan exposed but trying to cover the rest to keep dirt and whatnot out of the socket area.
The LED bulbs and fans are waterproof. They produce some heat and really rely on the fan and heat sink to dissipate that heat.
Using the rubber boot with a little cut out for the LED fan often doesn't allow enough cooling.
I have used similar LED bulbs in my ATV. Quite often fully submerged. No issues at all. Actually, after playing in the thick mud, we would play in the river or pond on the way back to wash the nasty off.
Also, if you unplug all but the bulb you are adjusting, it makes life much easier.
I just took a piece of plywood, made a line at 20.5" off the ground, placed it 25 feet in front, and adjusted each housing (powered alone) to hit the mark.
Since I am running 22" rims all around, I went with the higher side of what a base model calls for.
If you have an SL, there is a bit of forward rake due to the 2" different rims. I would go with 21.5" from ground in this case.
Great advise! I understand the shutter on the center lights. Is the adjustment on the center lights in the low beam setting only a right-left adjustment because of the shutter. And only the height adjustment available in the high beam mode? Seems it would be.
Also - have you or did you adjust the side H-3 lights toed out a bit to the right and left for better side visibility or just pointing straight a head?
I adjusted the inner lights in low beam mode so the cutoff matches the same as the outer lights. There are 2 torx above each housing that allow for adjustment.
Polaris calls for the following at 25 feet:
19-20.75 inches (48-53 cm) for base models
20-21.75 in (51-55 cm) for SL models
While Polaris gives an adjustment for what they call “auxiliary” headlamps (the outers), I adjusted them to align with the same as the inner lights.
Edit: I keep them straight ahead. They have a wide beam pattern. No need to toe out.
Yes the H-11 is full on while the H-3 is a running light. All 4 as H-11 would be seriously bright- as long as it’s respectful to oncoming traffic 😎
Overkill has never really been an issue on this forum and 😜
The H11 and H3 bulbs that I bought are the same brightness…..Very bright.
Both inner and outer housings are projector housings that have a very wide beam with a sharp cut off line.
The inner housing has a mechanical shutter that opens for the high beam. The light doesn’t get brighter, it just lifts the shutter for a full round reflector as opposed to a half moon pattern.
I would certainly suggest adjusting both as per the manual. Even stock and untouched, I see many are way out of adjustment. With such a sharp cut off, even being a slight bit high transitions to a huge difference 100 yards ahead of you. Adjusting both are very easy. I believe they are torx T20 (maybe T25). Plus, when they are all adjusted to focus in front of you, that gives you much better visibility of what you need to see. Easiest analogy would be to take 4 flashlights and point them in parallel at the wall. Then adjust them to the same spot on the wall. Big difference.
Ok here goes a possible stupid question... If you want an H11 or H8 or H9 LED are they all the same as far as the install goes? In other words are all bulbs with that designation the same "twist and install" design? So even if it says it is for Honda or whatever the bulb will fit our SS because it is an H11 etc?
H11, H8, H9 all have the same base.
In your SS or javelin? If the SS do you remember #'s perhaps - Amazon order ? Perhaps these???
These were the bulbs for the inner H11 lights:
https://www.amazon.com/dp/B07R…A2?_x_encoding=UTF8&psc=1
These were the outer H3 lights:
https://www.amazon.com/dp/B088…3R?_x_encoding=UTF8&psc=1
Installing the inner H11's are as simple as plugging them in and 1/4 turn to lock.
The outer H3's are a bit challenging no matter what LED you use. The stock Slingshot housing has the locking clip that tends to be a pain. These bulbs can slide out of the H3 mount. This allows you to clip the H3 ring in place and then just push the bulb (and fan) into the housing (there are 2 rubber o-rings that seal it). The last pic on Amazon shows that it removes from the H3 mount.
The power plugs are just male blade connectors so, just plugged them into the Slingshot's female blades and secured with electrical tape and zip ties. I did not re-install the rubber boot. It would only trap heat. Bulbs are waterproof.
Disclaimer - I did need to use a rat tail file to the H3 mount as it was a bit too tight at the half moon and square locks on the factory housing.