Dave said you took pics, where they at??
Sorry I missed out on the fun, wound up taking my kids to the zoo, think I was worn out more from doing that vs doing a wrench day ![]()


 EjFord likes this.
wokka, mytoy and OrangeSlingFL like this.
wokka and 9 others like this.
kev likes this.
dangerdarrell and 3 others like this.
Frankie55 and 12 others like this.
Edward Neal and 10 others like this.
EjFord likes this.
mytoy and Doc&Ruby like this.
Doc&Ruby and DER like this.
Doc&Ruby, wokka and SlingSC like this.
SlingSC, kev and Frankie55 like this.
EjFord and Br4hm4 like this.
EjFord likes this.
Roadhawg and 3 others like this.
EjFord and 3 others like this.
EjFord likes this.
wokka, mytoy and OrangeSlingFL like this.
wokka and 9 others like this.
kev likes this.
dangerdarrell and 3 others like this.
Frankie55 and 12 others like this.
Edward Neal and 10 others like this.
EjFord likes this.
mytoy and Doc&Ruby like this.
Doc&Ruby and DER like this.
Doc&Ruby, wokka and SlingSC like this.
SlingSC, kev and Frankie55 like this.
EjFord and Br4hm4 like this.
EjFord likes this.
Roadhawg and 3 others like this.
EjFord and 3 others like this.


Dave said you took pics, where they at??
Sorry I missed out on the fun, wound up taking my kids to the zoo, think I was worn out more from doing that vs doing a wrench day ![]()
 Display More
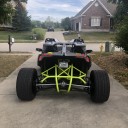
The old 1-2 project... shocks and rear protection plate installed this afternoon!
All jacked up & ready to remove the OEM shocks. There's quite an apparent difference between these and the QA1's!
Had some trouble with the install at first. Bill from Hahn RaceCraft was very nice, took my call and everything went easily from there. Hahn's video on YouTube was helpful as well.
With the front end done (45 min), I moved on to the rear.
Disassembly of the rear panels took about 30 min, but all came off without any big problems. I was installing a rear protection plate at the same time, so I took the plastic pieces aside to get 'em cleaned up.
Tuff Stuff foaming cleaner from O'Reilly's did a great job cleaning the road grime off, Mother's Back to Black followed by Turtle Wax Spray Shine got the plastic looking great. I did not polish or wax the area where the rear plate mounts, the 3M tape needed a pristine surface to bond to. Cleaned that with rubbing alcohol.
Drilling holes and getting the plate mounted was easy, putting in the plastic anchors was a bear. Holes too small, predrilled more than once. Flexing the anchors caused paint to flake off. 🤨 Finally got 'em in place. This all took about an hour.
Reassembly of the back end was okay, a couple false starts, but eventually everything snapped back together and all the screws and anchors snapped home snugly. I must say the 20 mph wind didn't help! Could have used an extra hand! Reassembly took about 45 minutes.
Short drive, about 2 miles was nice. Going to put on a few more miles and dial in the adjustable shocks to where I want 'em.
Very satisfied with my project and my improving wrench skills!
Hey, don't I get a merit badge for this one!? 😉
do you use RIVNUTS? since i had seen them used on here i don't use anything else. That tool is the next best thing to slice bread lol
 Display More
Interestingly enough, I think mine did as well, won't hold a charge after pulling the tender off.
Picked up a new battery at Summit that will get put on in a few days.
Also, tonight, while doing the other side brake calipers, I moved a rag and found one of the brake line washers laying on the floor, OOPS. Had to pull the other wheel off from last night and put that back where it goes. Was afraid I'd do something silly like that, was holding the caliper up with one hand, trying to thread in the brake bolt thingy, all while trying to not get brake fluid on any painted part or mess up my powder coating.
It's fixed now. Hoping tomorrow to get the new parking brake setup for the quad and brakes bled.
SlingRider Painter Br4hm4 wickedwebby Troy at TrakHamr sent me a dual parking brake setup with my Wilwood kit. It's a universal kit, made by Lokar here in the US, part number is EC-80FU, assuming it will fit the vette calipers, or be modified to do so. https://www.amazon.com/Lokar-E…ncy-Housing/dp/B000CONKC4
I was able to modify the existing parking brake with a washer and by cinching up the cable all the way. Now it's working like a champ!

I was able to modify the existing parking brake with a washer and by cinching up the cable all the way. Now it's working like a champ!
My previous one worked, but it was just single wheel. With this kit, it will work with both rear wheels.

do you use RIVNUTS? since i had seen them used on here i don't use anything else. That tool is the next best thing to slice bread lol
These look great - my only question is would they work well on the plastic panels? The plastic anchors are supposed to hold the steel protection plate and the plastic panel behind it together. These look like they would work if I had applied the Rivnut to the plastic panel before I attached the metal panel with the 3M tape. For those who are installing a rear panel in future, I think I would look into this!
i install them into the plastic and then use the screws just like you would any other product. kind of like putting a screw into a light switch cover, if that explains it better. here is a pic that i installed the mats in the cockpit with rivnuts and then screwed them on. You will have to zoom in to see it.
These look like they would work if I had applied the Rivnut to the plastic panel before I attached the metal panel with the 3M tape. For those who are installing a rear panel in future, I think I would look into this!
with the rivnut, drill the hole, insert the rivnut with the tool, it compresses it and locks it into the hole, that leaves a metal threaded piece and then you can put on and take off the rear panel any time you need to. I have started using this for everything I put on now. This way i can take things off if they aren't working right.
i install them into the plastic and then use the screws just like you would any other product. kind of like putting a screw into a light switch cover, if that explains it better. here is a pic that i installed the mats in the cockpit with rivnuts and then screwed them on. You will have to zoom in to see it.
Okay, I'm definitely going to have to try Rivnuts now - I've got mats waiting to install this weekend!
i will try to take the mat off, get a close up pic of it and then show you them on here.
My previous one worked, but it was just single wheel. With this kit, it will work with both rear wheels.
What, Slingshots now come with TWO rear wheels???
Come with? Nope, but they can be improved!


loving my Trak Hamr
How's the rooster tail on those things, ya b@stards?! ![]()
We just have two of them, vs one on your slingshot, unless you put a fender on it ![]()
Dave said you took pics, where they at??
Sorry I missed out on the fun, wound up taking my kids to the zoo, think I was worn out more from doing that vs doing a wrench day
I didn't get pics of the work... Was busy working... Maybe 2W2X1 did.
I did get some drone shots that I'm excited to use in Kerrville come April. 😁
Setting up my iPad mini for navigation. And a new mount for my iPhone.
Setting up my iPad mini for navigation. And a new mount for my iPhone.
what mount are you using for the ipad mini?
I picked up this mount off Amazon, and used some extra bracketing from my go pro camera, I did a little grinding and cutting on the bracketing to make it work with the mount.
1
