


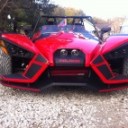
Drilled and tapped my clamps today and cut my threaded rod at four inches. Ready to cut and fit conduit tomorrow. Can't wait to continue to move forward. One difference I do see with the Bullet Speed top versus the Twist Top, the canvas cover covers a little more area than the Twist Top. Might have to modify canvas top a few inches where the back to clamps connect.![]()

DIY Rooftop Carrier For Aftermarket Twist / BulletSpeed Canvas Top
-
-

Drilled and tapped my clamps today and cut my threaded rod at four inches. Ready to cut and fit conduit tomorrow. Can't wait to continue to move forward. One difference I do see with the Bullet Speed top versus the Twist Top, the canvas cover covers a little more area than the Twist Top. Might have to modify canvas top a few inches where the back to clamps connect.

The canvas will fold back a bit. I used PVC pipe to cover the allthread to prevent chaffing on the canvas. It also gives the rails a more beefy look.
Don't forget to post your finished pics.
-
Yes now I see the additional benefit of the pvc. I will post a ton of pics. Thanks once again airoutlaw for all your hard work and paving the way to make this super easy for me. I considering capping the end of the ends of the 1" conduit. I don't have the benefit of using black paint. I wish I did I have a ton of it. I'm afraid that the high dollar lime squeeze paint I had mixed won't stick to the wooden dowel ends. Paint store said it wouldn't.
-
Saw this, copied it, works fantastic!
The top one is the one I copied, been on 2 trips so far, no problems what so ever, heading to New Mexico and Colorado in May.
-
Looks great. I hope to work on mine more tomorrow.
-
looks like that it is adaptable to other styles of tops. Good Work!
-

looks like that it is adaptable to other styles of tops. Good Work!
welcome aboard riesriders - looking forward to photos of your ride and adventures
-
Well, fabrication is nearly complete. Everything worked exactly as airoutlaw said it would. Only thing left for me to fabricate is the pvc to cover the all thread and its on to paint. I have mixed feelings about whether to go lime squeeze or to paint it black. Black would be much easier that's for sure.
-
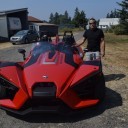
This cargo carrier will be a game changer for us. We love to take two day trips with the SS but now the two day trips can easily turn into four day weekends. The little woman is already talking flea market trips and is looking for waterproof luggage.
-
Well, fabrication is nearly complete. Everything worked exactly as airoutlaw said it would. Only thing left for me to fabricate is the pvc to cover the all thread and its on to paint. I have mixed feelings about whether to go lime squeeze or to paint it black. Black would be much easier that's for sure.
They do sell plastic/nylon tubing in many different colors YOU KNOW!
-
They do sell plastic/nylon tubing in many different colors YOU KNOW!
I am not familiar but am definitely interested. Help?
-
I am not familiar but am definitely interested. Help?
Also electrical shrink tubing comes in different colors. The nylon tubing I just looked at is on http://www.freelin-wade.com/standard-nylon-tubing Either way would be easier than painting if you could find a color that works for you. Also if you decide you do not like the color you can change it. Just oder the I.D. (inside diameter) for what ever you are trying to do. Also the Shrink tubing would be a smaller diameter than the tubing if that might be a problem. I have always done this if I had threads that I did not want to cut off for some reason or was otherwise exposed.
-
I think it would look good with the support rails in lime squeeze and the rack in black to match the look of the top.
-
I think it would look good with the support rails in lime squeeze and the rack in black to match the look of the top.
I do too. I think the part that stays fixed all the time will be lime squeeze and the removable part black.
-
If anyone is thinking about doing this, I have the 4 steel mount clamps the OP list in post #1. I already drilled and tapped for 3/8 rod. Did it on drill press and they came out great. I went another route with my mounts. I would sell for $50 shipped if someone is interested.
-
I now have the mounts and the rack (cage). The rack is the same as the one in post #55 above except that it is silver. It doesn't have the rectangle crossbars like I mounted mine. I bought the second silver one because I wanted the crossbars for another project. If you install it like the OP did in post #1 all you would need is the steel conduit. I would sell both for $100 and split shipping.
-
Those clamps could be used for other projects on the Twist Dynamics/Bullet frames.
Light bars, flags, speaker rail...
-

I plan to use these same mounts, but it's hard to see how you attached the cross-member to the mounts, can you share a closeup pic? Also, what did you use for the cross-member?
I was thinking about using u-bolts and the steel conduit as the OP mentioned, but open to other ideas of course.
Thanks!
-
I tapped a 5/16 hole in bracket. The cross bars came with rack. they are 3/4X1" rectangle steel. No reason you couldn't use conduit are any square stock from Home Depot type store. Just remember on the Twist top the two bars are not the same length. don't ask me how I know that.
Mike
-
Gotcha, thanks for the pic. You aren't using OPs rack, that's what confused me. I like your design, clean and simple. I wound up ordering the same rack as the OP, https://www.amazon.com/gp/product/B00FQT1FF4/
