NOW AVAILABLE - The R-Shot Ride or Die Footrest

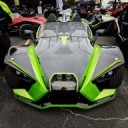
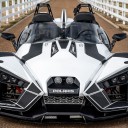
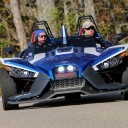
  • The new R-Shot Ride or Die Footrest allows your passenger tostretch out and enjoy the ride as if they were in the driver seat. Madefrom steel and powder coated textured black for long durability.


    The idea originated from our very own @KayTwo, … he chargedR-Shot Accessories to design a strong footrest that is easy to install andcomes with the tools needed to make this a painless installation. (Thanks again @KayTwo)


    The newR-Shot Ride or Die Footrest gives the passenger the ability to stretch aleg out and catch some breeze. Perfect for most adults from 5' 5" to6' 2" in height. The easy installations of this product isincredible, and the tools you receive with this product makes it quick andpainless effort. Some effort is needed to get your hands in the small cavity to place the bracket around the 1.5" frame and close the bracket with the longer M6 bolt attached. The tools are not thetypical short Allen Wrenches you get with cheap DIY furniture setups. The tools are long handle 9"+ Allen Wrenches. Asmentioned earlier the foot plate is made from cold rolled steel - thisfootrest is durable and is powder coated textured black and comes with asoft pad option. All hardware is stainless steel and the bracket is madefrom aluminum and as always you receive FULL color instructions with pictures.


    This setup is for the passenger side, however if you have an automatic transmission this is without a doubt an awesome modification you cannot go without. I will update the website for those who have an automatic transmission and wish to stretch the driver's leg. I don't recommend the drivers side if you still have a 5 speed.... this might cause major challenges for the less skilled driver - and R-Shot Accessories doesn't wish to be liable. For all other skilled drivers @FunCycle and many other and Auto Transmission Slingshot, @rabtech and @Dave@DDMWorks - this is THE ONE... R-Shot Ride or Die Footrest!


    Shipping on 17 July - Pre-Order!


    Forall models; 2015 - 2018


    Seemore information at RShotAccessories.com


    WE WERE ALL HUMANS UNTIL
    RACE DISCONNECTED US,
    RELIGION SEPERATED US,
    POLITICS DIVIDED US,
    AND WEALTH CLASSIFIED US.

  • Chapter 1: packaging and initial impressions.


    If you've gotten anything from @lrobbi before, you know his packaging is above par. This one came tightly taped, bubbles above and below, in a foam packaging envelope, sealed in a custom printed plastic envelope, and then the packaging itself was on a cardboard sheet, tightly shrink-wrapped. Taking this thing apart reminded me of the Christmas is when my dad would use a whole roll of duct tape on my presents.


    The directions are very nicely written, lots of pictures and arrows, and did not confuse me in the slightest. That's saying something.


    Also, Lewis included a couple of extra parts for steps of the installation that he knows from experience have a high chance of dropping and losing the small parts. That was a nice touch.


    Overall, 10/10 on first impressions.


  • I am liking this a whole lot.. I ride with my left foot tucked up by the seat. And allison keeps her feet outside. If I had that I would definitely use it on the interstates. @Ghost and his wife went with me to Nashville this morning at 4am to cars and coffee. I would have used it all the way there on the interstate.

  • I am liking this a whole lot.. I ride with my left foot tucked up by the seat. And allison keeps her feet outside. If I had that I would definitely use it on the interstates. @Ghost and his wife went with me to Nashville this morning at 4am to cars and coffee. I would have used it all the way there on the interstate.

    His website says the drivers side one is for automatics only, but cruising on the highway, I would definitely use one myself. No different than highway pegs.

  • I like that. I drive with cowboy boots most of the time and before I put the fenders on I use to hang the boot heel on the splash guard fender.

  • Chapter 2: Installation


    First thing first, this is a prototype, and there are a couple recommendations I'm going to make to @lrobbi, so I won't go into those too much. I'll just talk about some generalities here.


    Now, the instructions. Very clear and clean and well written, but the pictures may be a bit confusing if you don't recognize what you're looking at. I spent a little bit of time mocking up the placement of stuff, but I'm also dumber than most.


    Now, the location is not ideal. I wish I had a way to easily raise the Sling up a foot or so, so the chair I was sitting on didn't still require me to bend over. You also have a couple steps that it's easier to sit in the seat for, but then you're bending and reaching, so...not the easiest location to work in. It is what it is.


    Specifics:


    Some of the steps need ironing out and maybe some tips and tricks added. For example, my frame is white, so I didn't want to scrape it too bad, so I pulled the legs of the "C" bracket apart pretty far. That made it too tough to push them back together to get the bolt in. So, on advice from Lewis, I wrapped that section in clear packing tape, to prevent the dings on the frame. Then I was able to keep the bracket a lot tighter as I fitted it onto the frame. That's just one example.


    There's also some tight clearances for fingers, especially if yours aren't as dexterous, such as mine. Lewis has added a couple spare parts, the smallest ones, so that if you fumble one, and can't get it back, you have a replacement right at hand. Nice touch.


    Total install time (once I pulled my head out of my ass): 15 minutes.


    If you have a regular passenger, recommend having them there to test. For example, if they like putting their heel on the platform, they'll likely want it more level. If they like putting the sole of their foot down, they'll probably want it canted up a bit, more towards them. As you can see, this one is canted a fair bit.


    I think that's it for now, but I'll clarify anything for anyone with questions.