


I still haven’t put mine on either. I really need to before I go to SC next week.
Rear Protection Anyone?
-
-
No pictures... but happy to report rev dynamics did me a solid and installed it while they had my rear section of exhaust off for my air ride install. I love it!
-
Well, this thread has been quiet for a while but I want to give a huge thanks and shoutout to @DKF Texas for the 13 plate order she put together for her Texas brothers and sisters in her Facebook group. We were able to save $15 plate by bundling them into one shipment! They should be arriving any day now and they will be running around the countryside in no time. Cheers Danna! I really appreciate you!
Thank you! Everyone is excited to get them!
Sent from my iPhone using Tapatalk
-
Don't delay! Protect your rear today! Gloss Black ($80), Flat Black ($75), Gloss Red ($85), Clear Diamond ($75), ready to ship...
-
Don't delay! Protect your rear today! Gloss Black ($80), Flat Black ($75), Gloss Red ($85), Clear Diamond ($75), ready to ship...
In honor of @Tripod "Protect your rear because people just can't control the urge and Prep-H is only for afterwards....Don't delay! Protect your rear today! Gloss Black ($80), Flat Black ($75), Gloss Red ($85), Clear Diamond ($75), ready to ship" Don't get caught with one or your rear can get tore up LOL...
I'm sorry @SlingLow it's the middle of the week and as I read your post Tripod came to mind and I knew he or @MiM would have been all over that post lol
-
In honor of @Tripod "Protect your rear because people just can't control the urge and Prep-H is only for afterwards....Don't delay! Protect your rear today! Gloss Black ($80), Flat Black ($75), Gloss Red ($85), Clear Diamond ($75), ready to ship" Don't get caught with one or your rear can get tore up LOL...
I'm sorry @SlingLow it's the middle of the week and as I read your post Tripod came to mind and I knew he or @MiM would have been all over that post lolDon't delay! Protect your rear today! Gloss Black ($80), Flat Black ($75), Gloss Red ($85), Clear Diamond ($75), ready to ship...
In honor of @Tripod "Protect your rear because people just can't control the urge and Prep-H is only for afterwards....Don't delay! Protect your rear today! Gloss Black ($80), Flat Black ($75), Gloss Red ($85), Clear Diamond ($75), ready to ship" Don't get caught with one or your rear can get tore up LOL...
I'm sorry @SlingLow it's the middle of the week and as I read your post Tripod came to mind and I knew he or @MiM would have been all over that post lol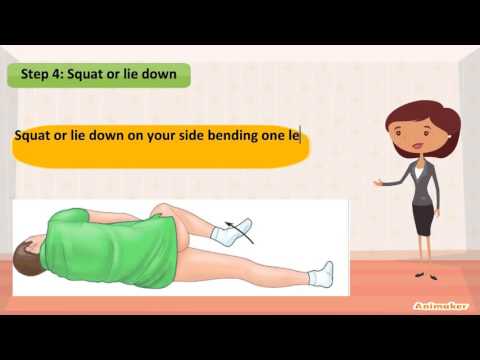
For after your ride!!
-
Reaper you are scaring me...............
-
LOL I'm happy that I was on the first group buy to protect my rear after seeing Reaper's post LOL Gloss Red it was LOL...ummm...now, I should have read the warranty paperwork to see if it was penetration proof LOL
-
I've gotten a couple requests for the rear protection plates to match the Orange Madness paint. The problem with producing them is that I need to have them painted in batches to keep my pricing which means I would need a few more buyers to justify buying the powder. So if there is anyone out here who would be interested in an Orange Madness rear plate, please speak now or forever hold your peace!
I do have pearl red, gloss black, flat black, clear coated aluminum and unpainted (ready for your custom color) ready to go.
-
I'm interested in one in flat black. Is there a web page that shows installation?
-
I'm interested in one in flat black. Is there a web page that shows installation?
He sends instructions, but it's really very simple. You shouldn't worry about it.
-
@ulflyer here are the instructions that are included with the plate to guide the installation. It is broken down into very simple steps. I see a couple of tweaks I'm going to make regarding use of the jack to pull the panel once all of the fasteners are removed. I don't have a video but my much more tech savvy wife says we could make one. Not today, but perhaps later this summer. I have one flat black plate on hand ready to ship then more will be made. Where are you located? If you're within 172.3 miles of me (unlikely), I'll ride up, down or out and install it for the additional cost of lunch. Or a good road to ride.
To install rear plate:
1.Remove two push fasteners from lower left edge and one push fastener from lower right edge of rear panel.
2.Remove four T25 screws from left edge and four T25 screws from right edge of rear panel.
3.Remove three T40 bolts from center of bottom edge of rear panel.
4.Remove four T40 bolts from the top edge of the rear panel.
5.Loosen the panel by working the top edge out from under the lower deck panel above it while keeping the lower edge of the panel in the forward position. If you pull the lower edge back towards the rear tire, it will make it more difficult to clear the top.
6.Use a 15mm socket to remove the lower rear shock mount nut from the shock mount bolt.
7.Place a jack under the right rear lift point and lift the Slingshot slowly until the shock mount bolt is finger loose and remove the bolt by hand. Secure the vehicle with a jack stand for safety.
8.Raise the bottom end of the rear shock to remove the rear panel over the top of the rear tire. Replace the rear shock bolt temporarily for safety.
9.Place the rear panel on a flat surface then place the rear plate in place on the rear panel. Carefully position it snugly in place left to right while using the radius cut for the shock hole to align it up and down.
10.Mark the center of the two holes with a fine tip sharpie. Remove the rear plate.
11.For increased accuracy, use an exacto knife or similar sharp point to mark the center of each hole location.
12.Use a 1/8” drill bit to drill two pilot holes.
13.Use a 5/16” drill bit to drill the two fastener holes through the pilot holes.
14.Replace rear plate on rear panel to ensure alignment of the holes.
15.Thoroughly clean rear panel of all dirt, grime and residue. Use a degreaser if necessary.
16.Clean all areas of rear panel where 3M tape will be attached with Isopropyl alcohol.
17.Release the tape backing.
18.For increased adhesion, use a heat gun or hair dryer to heat the plastic in the areas where tape will attach as well as the rear plate itself. 3M recommends an installation temperature of 50-100 degrees with 70-100 degrees being ideal.
19.Place the rear panel on the floor and carefully lay the plate in place on the panel, making sure that the radius cut and fastener holes align.
20.Per 3M specs, apply a minimum of 15 lbs pressure per square inch for a minimum of 60 seconds. One person can do this by placing hands and knees on the corners and center of plate for the desired time. 50% of ultimate bond strength will be achieved after 20 minutes, 90% after 24 hours and 100% after 72 hours.
21.Install the base of each fastener through the fastener holes then install the center pin in the fastener and depress fully.
22.Make sure the shock bolt is finger loose and remove the bolt.
23.Raise the shock and replace the rear panel over the top of the rear tire.
24.Replace the shock bolt and nut. Use a 15mm socket and 17mm wrench to snug the nut.
25.Lower the Slingshot to the floor and torque the shock mount bolt to 50 lbs +/- 4 lbs/sq in.
26.Work the top edge of the rear panel back up over the lower deck panel above it.
27.Replace four T40 bolts on the top edge of the rear panel.
28.Replace four T25 screws on left edge and four T25 screws on right edge of rear panel.
29.Replace three T40 bolts in center of bottom edge of rear panel.
30.Replace two push fasteners on lower left edge and one push fastener on lower right edge of rear panel.
31.Ride baby, ride! -
Slinglow, thanks for details. Regretably, after looking at install info, I'm not able to do what it takes to install one. Eventually I would like to have a fender put on; had one on previous SS which kept the rear and topside pretty clean.
BTW, I live in N.C. Can't figure how to get my location put under the Avatar! I have mapped it tho.
-
Slinglow, thanks for details. Regretably, after looking at install info, I'm not able to do what it takes to install one. Eventually I would like to have a fender put on; had one on previous SS which kept the rear and topside pretty clean.
BTW, I live in N.C. Can't figure how to get my location put under the Avatar! I have mapped it tho.
No problem! I'd like to add a fender as well - especially after being caught in a couple of gully washers in Canada. Boy does that make the Sling a mess!
To add your location, click on your avatar in the far upper left corner of the dashboard or forum page. That will open a window with several options. At the top is 'edit profile'. If you click that it will open another window with several options including location. When you fill that in and hit save at the bottom, it should appear at the bottom of your avatar like mine is to the left of this post.
-
@ulflyer, installing the plate took me 20 min on my SS and 15 on my wife’s. Just took off the wheel, cleaned the back panel well, cleaned again where tape was going, applied tape, applied panel. Then got out right size drill bit and taped it so I wouldn’t drill too deep. Drilled holes, installed pushpins, put wheel back on. Nothing to it. Just don’t drill through the tank. You probably have at least an inch to work with. They are well worth the money and make cleanup of the back end much, much easier.
That sound like a much more simple option @dangerdarrell I now intend to give it a go, using the same method, when I fit my one.
I think that I'll fit a little stop collar, over the drill bit, to stop me drilling too deep. Does anybody have the dimension, for the depth of the panel, so that I can set the stop.
Stop collars, in picture above. -
Drill at a high rate of speed and keep going until something breaks....oh wait....I was telling you what not to do!

SSREAPER
-

Drill at a high rate of speed and keep going until something breaks....oh wait....I was telling you what not to do!
SSREAPER
But that's my normal method of doing things.
-
Shouldn’t have to drill more than 3/8” (not certain on metric size). If that is not enough to go through than just add 1/8” till it just breaks through. Should be no problem. I even watched ours for a bit to make certain there was no fuel leak. I believe there is more than an inch between the panel and the tank.
-
Yeah, I hand drilled and didn't even remove wheel... Very simple and hasn't fallen... Think I was one of the firsts...
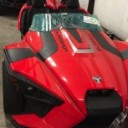
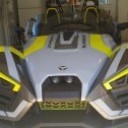
Reminder pic:
